
Convert Your Computer to 12v DC
Part of living off-grid in a Tiny House is minimizing power usage. A lot of people simply use 110v/240v AC inverters to power electronics and appliances in there Tiny House. The issue is, most AC inverters incur about 10-20% in power losses. There are even more losses involved when it comes to running a domestic 110v/240v fridge using an inverter. Household refrigerators usually operate the compressor for about 5 minutes every hour. However the 110v/240v inverter needs to operate 24/7 to ensure power is available to it. This is a huge waste of power and energy.
For our own build, we are going to great lengths to purchases dedicated 12 volt electronics and appliances, or to convert existing 110v/240v electronics and appliances to 12 volt DC to minimize any losses and ensure everything in our Tiny House is as energy efficient as possible.
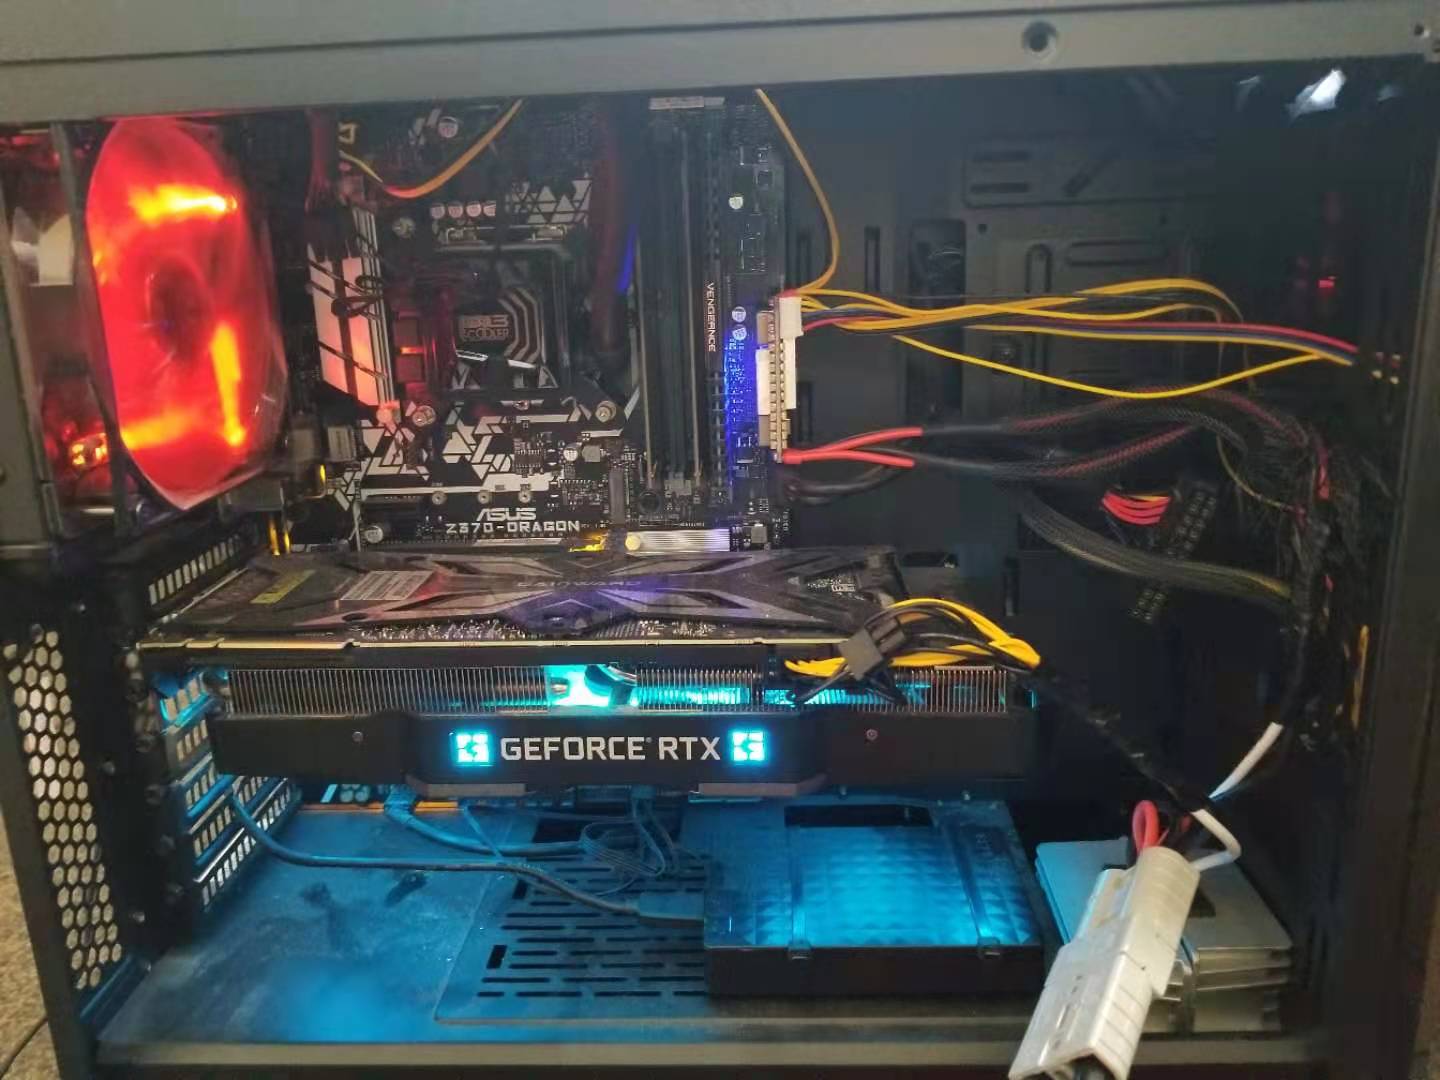
One of these electronics is my partners gaming computer. This computer operates a GTX 1080 graphics card and requires a 550watt power supply to run it. It is, by any sense of the word, power hungry. In fact this computer uses more energy in a single hour, then my refrigerator will use in an entire 24 hour period. It nearly requires more energy in 1 hour than the entire house would consume in a single day. This obviously became a point of contention, as there is a gaming laptop with the same specs as the computer sitting unused, which is twice as energy efficient and far easier to convert to 12 volt. Unfortunately, the gaming computer is a ‘must have’ despite all these issues. Nonetheless, I digress, and you get to learn how to convert a gaming PC to 12v.

At the bottom of this article will be links to work out the power usage of your PC in 12v DC.
Parts Required:
2 x 12v Buck/boost converters (25 amp each) Link Here
1 x Pico power supply (450 watt) Link Here
2 x Anderson power poles (or similar 50 amp connectors)
1 x 4 Gauge wiring kit (Red + Black) x amount of meters required
1 x 50 Amp covered fuse
2 x Cable crimp ends
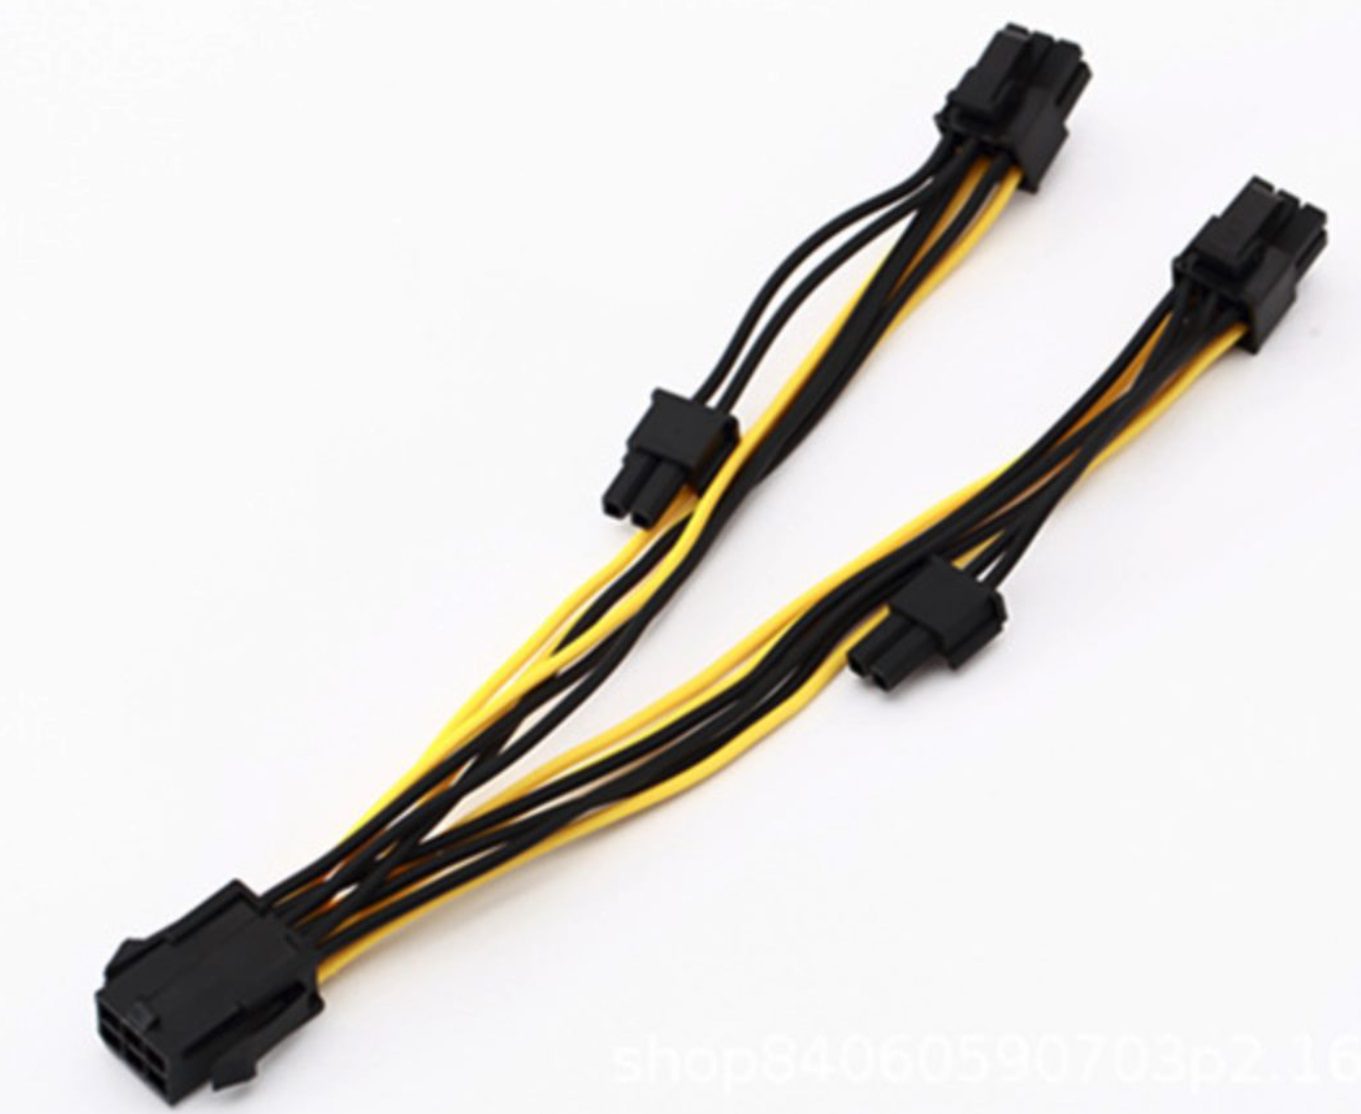
1 x PCIe 6/8 pin splitter cable


Before you start:
You can actually buy 12v power supply’s for computers. The issue is, that the 12 volt is simply a ‘passthrough’ of voltage input. What that means is whatever your input voltage to the Pico power supply is, that is the voltage it will give your motherboard. Considering battery packs can fluctuate between 13.5 volts and 10.5 volts, this will cause damage to your motherboard and graphics card. Computers love stability when it comes to power. To rectify this problem, I used 2 x 25amp buck/boost converters. A buck/boost converter essentially acts as a voltage stabilizer. It will take any input voltage from 10 – 23 volts and always output a reliable 12v, 25amp supply. If you are looking at converting your own computer to 12v, ensure you get a ‘buck/boost converter’ and not a ‘buck converter’ or ‘boost converter’. It needs to do both buck and boost. As when the input drops below 12v, it will boost the output; and when the input is above 12v, it will buck the output.
I would have preferred to find a single 50 amp buck/boost converter for this job, but it seems they either don’t exist, or cost over a thousand dollars as they become very specialized equipment. To get around this, I have divided my input power to use 2 x consumer grade 25amp supply’s.
One of these supply’s power the 450watt Pico power supply and motherboard. The second supply powers the GTX 1080 graphics card alone.
Step by step:
Step one:
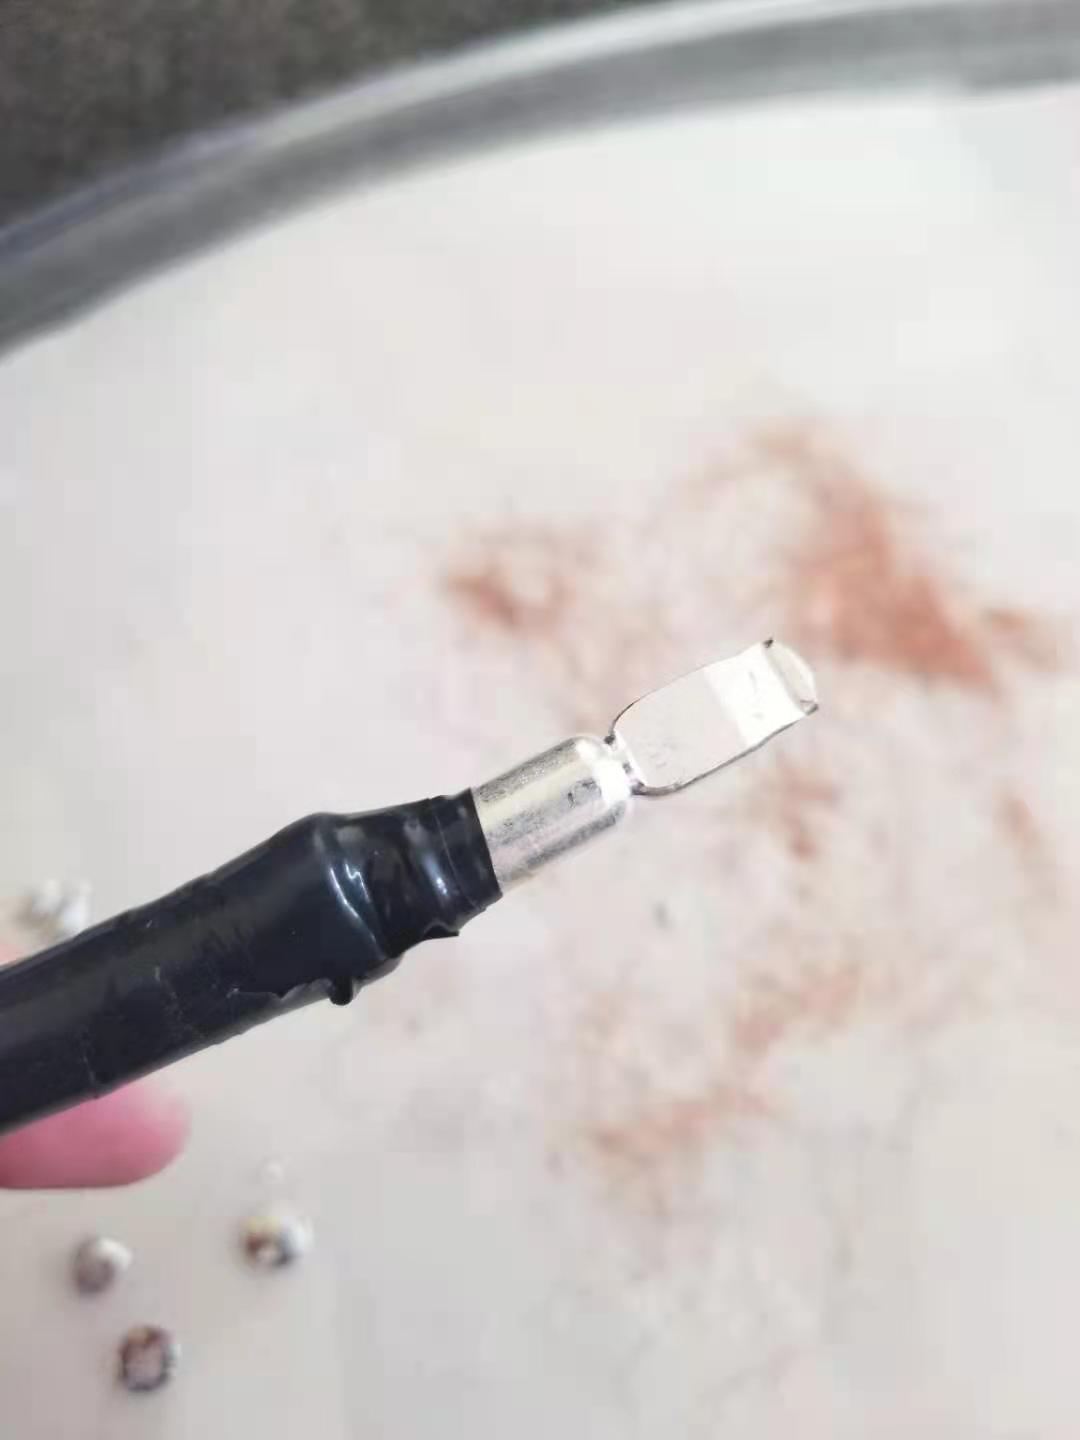
Wire the 2 x buck boost converter input wires (positive and negative) together. The Anderson power pole (or other 50 amp connector) crimps can then be added to the end of the wire. I used a soldering iron to connect my wires to the crimp ends. There are crimp tools available if you do not wish to do this.


Step two:
Connect the input positive and negative wires of the Pico power supply to the output wires of one buck/boost converter. I soldered these wires to ensure a permanent connection. You can use wire connectors here as long as they are rated for 25amps or more. You can see on the base of the converter which wires are input and which wires are output.


Step three:
Cut the two ends off the PCIe cable, and connect the positive and negative wires to the output of the second 12 volt buck/boost converter. With all PC wiring and ATX power supply’s, the black wire is negative, the yellow wire is 12v positive.


Step four:
Install the Pico Power supply. Connect the 6/8 pin CPU plug to your motherboard (should your computer use this) and connect any hard drive power wires. Lastly connect the secondary buck/boost converters 6/8pin plugs to your Graphics card (if you have one).


Step five:
Now to build the power supply cable. I used 4 gauge wires which were far too heavy for this job. You will probably get away with 8 gauge wire. Similar to the Anderson power pole connector above. Connect the crimp ends onto the positive and negative wires and install them into the plug. Again, I soldered these wires but you can purchase a crimp tool to do it without a soldering iron. Next cut about 30 cm off the other end of the positive wire; the battery connection side. Here a 50 amp fuse can be installed inline. Lastly, connect the wire battery end lugs to the battery side of the wires.


Results & Notes:
Now you have a PC that runs on 12v, with minimal losses from the buck/boost converters. It has a stable supply voltage to ensure it wont be damaged by fluctuating voltage levels. I will also be adding a switch on the wall to cut the 12v power wire when the computer is not in use. This eliminates standby power usage.
Note one:
If you do not have a heavy power consuming graphics card. You will only need a single buck/boost converter of 25 – 30 amps.
Note two:
I used a 450 watt Pico power supply as this was the largest available Pico power supply for 12 volt. If you require a larger one, you will need to switch to a 24 volt input. 450 watts was sufficient to run my computer with ease as I am powering the graphics card separately. I could have even gotten away with a 350 watt Pico power supply but did not want to risk it.


How to work out your PC power usage
If you have a basic PC, you may be able to simply google the power supply wattage. For example, a standard HP desktop will only use a 300 watt power supply to run the entire computer.
Things get a little more tricky for gaming computers. As long as you know your some basic information about the components, you can work out exactly how many watts your PC will consume.
Using this calculator: https://outervision.com/power-supply-calculator input your motherboard details, CPU details, amount of ram and hard drives, as well as your graphics card. It will also ask you your usage data. The site will then tell you how many watts your computer will use at a minimum, and what size power supply it recommends. Its important if you are using 2 x buck/boost converters that you do this calculation with and without your graphics card selected. This will give you a general indication of what your computer will consume; and what your graphics card will consume. Do note that GTX 1080 graphics cards do consume small amounts of power from the mother board even though they have an independent supply. According to the review from Toms Hardware (https://www.tomshardware.com/reviews/nvidia-geforce-gtx-1080-pascal,4572-10.html) it uses about 40 watts from the motherboard and the rest from the PCIe power cables. Your graphics card may be different and I would recommend searching it specifically.

Once you know how many watts your computer and/or your graphics card will use. You can head over to Rapid Tables to convert it to 12v DC amps –
https://www.rapidtables.com/calc/electric/Watt_to_Amp_Calculator.html
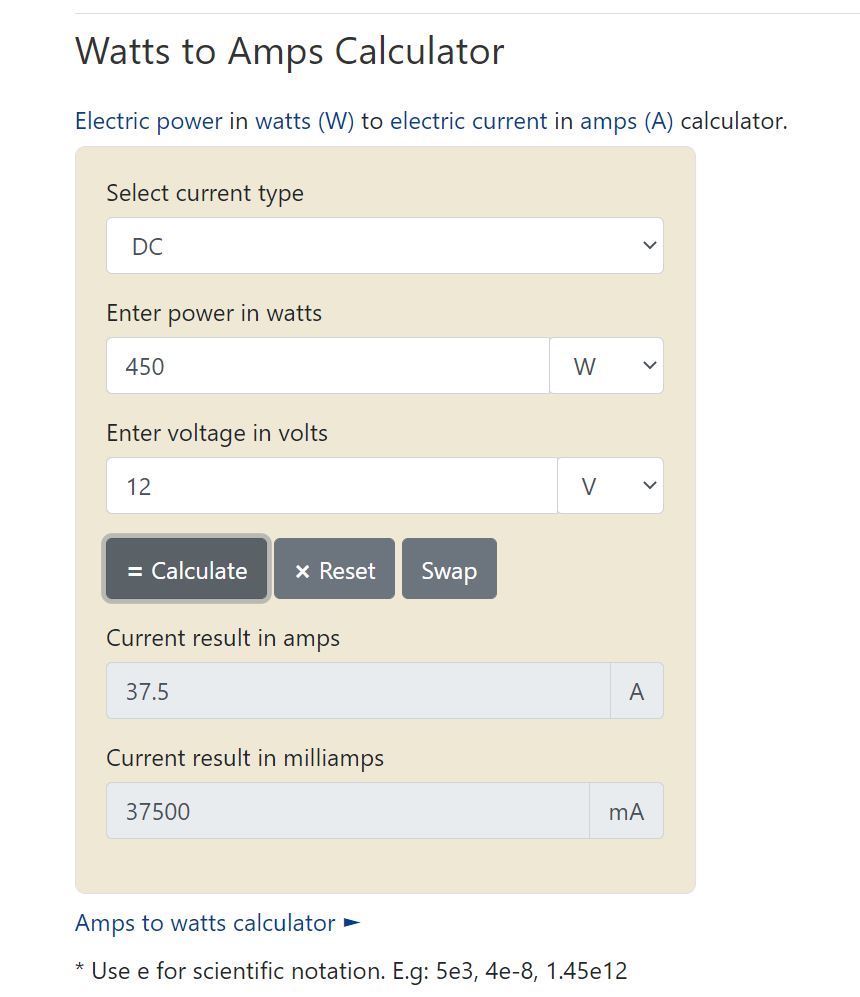
Lastly, you can now purchase buck/boost converts and a Pico power supply to meet your computers demands. If you get stuck feel free to email me for help.